Tuesday, July 31, 2012

double decker berry pavlovas


As a general rule, I am in no way a daredevil. I always turn my car off when I'm pumping gas. I don't cut the tags off my mattresses. I count my purchases before I get in the '15 items or less' line at the grocery store. I walk the straight and narrow.

But on this day, my friends, I mustered up every ounce of courage I could find and took a risk to beat all risks: I attempted to bake a Pavlova (for the first time!) on a hot, HUMID, scattered t-storm, summer day. I know...from Model Citizen to Wild Child. It's a slippery slope.


Anyone who's ever made this featherlight treat, or its first cousin, meringues, knows the countless warnings that come with each recipe: baking these on a humid day will most certainly lead to 'weeping' or 'beading' of  moisture on the finished product. So why take the risk?? Two reasons. One, after extensive research, I found several convincing articles stating that the amount of sugar, the rate at which you add it, and the total baking time are far greater determiners of the final texture than the weather. Two, this dessert was not meant for just any occasion...it was for an Olympics opening ceremony party. Go big or go home!

And truthfully, what better dessert for a London-based parade of nations celebration than this? With origins in New Zealand or Australia (depending on whom you ask!) and a name inspired by a famous Russian ballerina who claimed England as her home, Pavlova is the perfect multicultural sweet treat. Add billowing, fresh whipped cream, ruby red strawberries, and sweet blueberries, and you now have a patriotic-colored dessert that is just about perfect for cheering on Team USA.

Back to the recipe. The taste was phenomenal with the richness of the brown sugar and the lovely essence of vanilla playing perfectly off the light cream and berries. And the texture...oh my, the texture...consisted of a light, tender, crispy exterior and a chewy interior. In other words, heaven.on.a.plate.

Note: The original recipe calls for meringues baked in three 8" cake pans, resulting in one large, tiered Pavlova. I opted to pipe individual-sized rounds on a baking sheet. Also, in the spirit of London's famous red buses, I went with a double decker presentation rather than the three-layered variety.

Double Decker Berry Pavlovas
Yield: 8-10 servings

1 cup superfine granulated sugar*
1/2 cup packed light brown sugar
1 1/2 tbsp cornstarch
1 1/2 tsp pure vanilla extract
2 tsp distilled white vinegar
3/4 cup egg whites (from 5-6 large eggs), at room temperature

2 lb strawberries, trimmed and quartered
1 lb blueberries
2 tbsp granulated sugar

1 1/2 cup heavy whipping cream
1/4 cup confectioners sugar
1 tsp pure vanilla extract


Preheat the oven to 275°F. Line two baking sheets with non-stick baking mats or parchment paper.


Pulse the sugars and cornstarch in a food processor until well combined. Stir together vanilla and vinegar in a small bowl. Set aside.

Beat the egg whites with a pinch of salt at medium speed until they hold soft peaks. Increase speed to medium-high and add the sugar mixture 1 tablespoon at a time. After all sugar has been added, beat 1 minute more. Add the vinegar mixture, then beat at high speed until the meringue is glossy and holds stiff peaks, about 5 minutes. Spoon meringue into a pastry bag and pipe into circles (about 3 inches in diameter), creating a slightly higher brim around the perimeter to hold the whipped cream and berries.

Bake until the meringues have a crisp crust and feel dry to the touch, about 45 minutes-1 hour (insides should still be marshmallow-like). Turn oven off and prop door open slightly with a wooden spoon. Cool meringues in oven for 1 hour.

Meanwhile, toss berries with sugar and let stand at room temperature until ready to use (up to 1 hour). Prepare the whipped cream by beating the cream, sugar, and vanilla until soft peaks hold.

To assemble, place 1 meringue on each plate and top with a large dollop of whipped cream followed by a spoonful of berries. Repeat with a second layer.

*Can be made by processing regular sugar in a food processor until fine and powdery, about 45 seconds.

Adapted from Epicurious

Sunday, July 29, 2012

texas caviar


I had never heard of Texas caviar until a couple of years ago when one of my BFFs broke my heart by moving away from my dear Virginia to the much-much-too-far-away Lone Star State. Jen is one of the sweetest, most encouraging, most devoted, and, yes, most fashionable gals I know, and a send-off party for her deserved a full buffet of foods representing her new home. When my foodie research turned up this recipe, I immediately knew what my contribution would be to the menu. A black-eyed pea-based salsa full of peppers, tomatoes, onions, and garlic with a little kick of jalapenos and Tabasco? Yes, please.

Unfortunately, as is so often the case when you're eager to try new recipes, I forgot about this one after the party. Thankfully, it came to mind a couple of weeks ago when I was trying to decide on a dish for an outdoor movie soiree at another bestie's house. Craving something healthy after a week of indulgences and wanting a cool appetizer to combat the terribly hot and humid weather, I decided that this dish really should be brought out of retirement. Now I'm just left with the question of why I didn't do that sooner.

My alterations to the original recipe: swap out a jar of pimentos for a red bell pepper, exchange the parsley for cilantro, skip the oregano, and make my own vinaigrette - all of which I changed below.

Note: this dish really does taste best a day after it's made when the flavors have had a chance to sit and mingle together. Day 1 = good. Day 2 = great. You'll get the best results if you make it the night before and let it marinate for several hours.

Texas Caviar

3 16-oz cans black-eyed peas, drained and rinsed of all juice
1 bunch scallions, thinly sliced
1 tbsp Tabasco sauce
1 tbsp Worchestershire sauce
1 tsp black pepper
1/2 bunch cilantro, chopped
3 canned or fresh jalapeño chiles, chopped (I use fresh)
1 firm, ripe, chopped tomato
1 green bell pepper, finely chopped
1 red bell pepper, finely chopped
3 cloves fresh garlic, pressed or minced
salt and pepper to taste

Vinaigrette:
1/2 cup red wine vinegar
1 tsp cumin
1/4 cup canola oil

In a small bowl combine the cumin and vinegar. While whisking constantly, slowly add the oil in a thin stream until completely incorporated.

In a large bowl, combine the rest of the ingredients. Poor the vinaigrette over and stir until everything is well mixed. Refrigerate for at least 4-6 hours, preferably overnight, in a sealed or covered container.

Adapted from Epicurious

Thursday, July 26, 2012

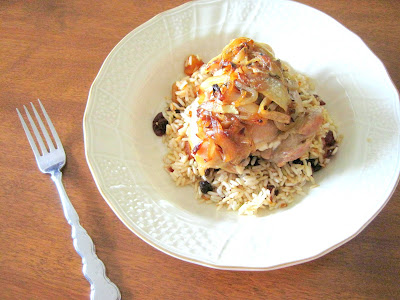
brie-stuffed chicken with caramelized onions and thyme


This meal was born out of pure necessity. Coming home to enjoy a few days of my vacation at my parents' house, I quickly realized that my mother had not had time to go grocery shopping after her most recent business trip (read: the refrigerator and pantry were virtually empty). Soooo, armed with little more than some frozen chicken thighs, a bag of onions, a packet of fresh thyme, a few ounces of brie, and an opened bottle of white wine, I set about trying to make something worthy of being called "dinner" before she came home from work. Ladies and gentlemen, may I present the finished product: pan-seared chicken thighs stuffed with tangy, creamy brie, capped with a stately top hat of thyme-infused caramelized onions, and drizzled with a light wine sauce. Mission accomplished.

Brie-Stuffed Chicken with Caramelized Onions and Thyme

4 chicken thighs
salt
2 medium onions, halved and sliced 1/4 inch thick
extra virgin olive oil
1 tsp fresh thyme
2 ounces brie
1/2 cup dry white wine

In a large bowl, prepare a brining solution by mixing 1/4 cup of salt in 1 1/2 quarts cold water until dissolved. Add the chicken thighs and allow to soak for 30-60 minutes.

Meanwhile, heat 2 tbsp oil in a large non-stick skillet over medium heat until shimmering. Add the onions and 1/2 tsp salt and cook until softened and lightly browned, 12-15 minutes. Add the thyme and stir 30 seconds longer. Remove from the heat.


Preheat the oven to 400°F.

Remove the chicken from the brine solution and rinse in fresh water. Pat dry. Carefully remove the skin and any excess fat using a sharp knife. Then cut a large pocket in the meat on one side of each thigh, leaving the other three sides fully intact. Place a half ounce of brie in each pocket.


Heat a light drizzle of oil in a non-stick skillet over medium-high heat until shimmering. Carefully add the thighs bone-side up, in batches if necessary, making sure to not over-crowd the pan. Allow them to sear, undisturbed, until nicely browned, 1-2 minutes. Flip, making them bone-side down, and repeat. 

Carefully pour the wine into the pan. Dividing the mixture evenly among the thighs, spoon a mound of caramelized onions on top of each piece. 


Place the skillet in the oven until the chicken is fully cooked, 20-30 minutes. If the onions start to get too dark, loosely cover the pan with aluminum foil. 


Plate and drizzle with the white wine pan sauce.

An Ashleigh original :)

Tuesday, July 24, 2012

chocolate chip cookie dough-filled devil's food cake with buttercream frosting


There are so many things 'right' about this dessert. Three layers of moist chocolate cake? Yes. Rich, creamy buttercream? Uh-huh. Two layers of fluffy filling reminiscent of chocolate chip cookie dough? Ohhh yeah.


In my family, we have the philosophy that if it's worth celebrating, it's worth making a three (or more) layer cake for. As such, we take our celebratory cakes very, very seriously. Mixing this cake with that frosting and these fillings - my mom and I love to explore endless varieties of flavor combination goodness. And this, my friends, is a winning combination. Seriously, it's hard to go wrong with the chocolate cake recipe that has been a staple in my parents' kitchen for several years - it's the perfect blend of rich-but-not-too-rich chocolate flavor and  super-moist-but-still-sturdy texture. Add to that this buttercream frosting that shows off just how delicious vanilla extract really is. And if that's not enough, throw in a filling that confirms once and for all that cookie dough really does have addictive properties.

In other words, find something - anything - worth celebrating and make this today. And let the party begin.

Chocolate Chip Cookie Dough-Filled Devil's Food Cake with Vanilla Buttercream Frosting

For the cake:
4 ounces unsweetened chocolate, chopped
1/4 cup Dutch-processed cocoa
1 1/4 cups boiling water
3/4 cup unbleached all-purpose flour
3/4 coup plain cake flour
1 tsp baking soda
1/4 tsp salt
2 sticks unsalted butter, softened but still cool
1 1/2 cups packed dark brown sugar
3 large eggs, at room temperature
1/2 cup sour cream
1 tsp vanilla extract

For the filling:
2 sticks unsalted butter, at room temperature
1/2 cup light brown sugar, packed
2 1/3 cups confectioners’ sugar
2/3 cup all-purpose flour
1/2 tsp salt
2 tbsp milk
2 tsp vanilla extract
1/4 cup mini semi sweet chocolate chips

For the frosting:
5 sticks unsalted butter, softened
5 cups Confectioners’ sugar
1/4 tsp salt
4 tsp vanilla extract
1/4 cup heavy cream

To make the cake:

Preheat the oven to 350°F. Grease three 8-inch cake pans and line the bottom of each pan with a round of parchment paper or waxed paper.


Combine the chocolate and cocoa in a medium bowl and pour the boiling water over, whisking until smooth. Set aside. Sift together the flours, baking soda, and salt in a second medium bowl. Set aside.


In a large mixing bowl, beat the butter at medium-high speed until creamy, about 1 minute. Add the brown sugar and beat at high speed until light and fluffy, about 3 minutes, scraping down the bowl occasionally with a spatula. On medium-high speed, add the eggs, one at a time, beating 30 seconds after each addition. Reducing the speed to medium, add the sour cream and vanilla and beat until combined, about 10 seconds. On low speed, add about a third of the flour mixture, followed by about half of the chocolate mixture. Repeat, ending with the flour mixture. Beat until just combined, about 15 seconds, making sure to not overbeat. 


Divide the batter evenly among the cake pans and smooth the batter to the edge of each pan with a spatula.  Bake until a toothpick or skewer inserted in the center comes out clean, 20-30 minutes. Cool the cakes on wire racks for 15-20 minutes. Run a knife around each pan perimeter to loosen. Invert each cake onto a large plate, peeling off the parchment paper and then reinverting onto a rack. Cool completely.


To make the filling:


In a medium bowl, beat together the butter and brown sugar until creamy. Mix in the confectioners’ sugar, one cup at a time, until smooth. Beat in the flour and salt. Mix in the milk and vanilla extract until smooth and well blended. Fold in the chocolate chips with a spatula.

To make the frosting:

In a large bowl, beat the butter at medium-high speed until smooth, about 20 seconds. Add confectioners’ sugar and salt; beat at medium-low speed until most of the sugar is moistened, about 45 seconds. Scrape down the bowl and beat at medium speed until mixture is fully combined, about 15 seconds. Add the vanilla and heavy cream, and beat at medium speed until incorporated, about 10 seconds, then increase speed to medium-high and beat until light and fluffy, about 4 minutes, scraping down bowl once or twice.

To assemble the cake:

Place one layer of cake on a cake board, platter, or stand. Spread 1/2 of the filling evenly over the cake, leaving a 1/4 inch border around the perimeter. Place a second layer of cake on top and repeat with the remaining filling. Top with the final layer of cake. Cover the entire cake in a very thin layer of frosting and then refrigerate for at least 15 minutes. This will create a 'crumb coat' and minimize the amount of chocolate crumbs showing through the white frosting. Once the crumb coat is firm to the touch, use the remainder of the frosting to cover the cake, decorating as desired.

Cake from The New Best Recipe. Filling adapted from Annie's Eats. Filling adapted from Cooks Illustrated April 2007 via The Way the Cookie Crumbles.

Sunday, July 22, 2012

vegetable tian-stuffed zucchini


Ahhhh fresh summer produce. As someone who loves to cook according to what's in season, I must admit to being slightly twitterpated by this time of year. Don't get me wrong. I adore the spinach and strawberries of springtime and the pumpkins and peppers of autumn. But, nothing warms my heart like summer's abundance of fresh squash, tomatoes, eggplant, berries, peaches, and melons. True bliss.

Predictably, this season's crops also produce a common theme among backyard gardeners: What in the world am I supposed to do with of all this zucchini?! Sauteed, roasted, baked into bread, fried as fritters - imaginations run wild trying to come up with ways to utilize this vegetable that is so often known for its bountiful harvest. Tragically, I don't have this problem. Living in a city apartment and working 60-80 hours a week has a way of stunting any potential of a green thumb during this chapter of my life. But, thanks to the generosity of my dear friend, Mary Beth, who passed along some of her own garden's gems (including the best tomato ever!), I too was left with that age-old burning question: What am I going to do with this enormous zucchini?! And this, my friends, was the perfect answer.

Vegetable Tian-Stuffed Zucchini

1 large zucchini (about 1 pound) or 2 medium zucchini
2 1/2 tbsp extra virgin olive oil, divided
2 medium yellow onions, halved and sliced 1/4 inch thick
salt
1 medium garlic clove, minced or pressed through a garlic press
1/2 pound yellow squash, trimmed and sliced 1/4 inch thick
1/2 pound plum tomatoes, cored and sliced 1/4 inch thick
1 teaspoon minced fresh thyme leaves, divided
ground black pepper
2 ounces Gruyère cheese, shredded (about 1/2 cup)

Preheat the oven to 375°F.

Cut the zucchini in half lengthwise. Scrape out the seeds and soft center flesh, leaving hollow shells. Set aside.


Heat 2 tbsp extra virgin olive oil in a large nonstick skillet over medium heat until shimmering. Add the onions and 1/3 tsp salt and cook until softened and lightly browned, 12-15 minutes. Stir in the garlic and 1/2 tsp thyme and cook until fragrant, about 30 seconds. Divide the onion mixture between the zucchini shells and spread into an even layer, covering the bottom of each shell.


Beginning at one end of the zucchini, alternatively shingle the sliced yellow squash and tomatoes into a single layer in a single row on top of the onions. Sprinkle with the remaining 1/2 tbsp oil and 1/2 tsp thyme and season with salt and pepper to taste. 

Place the shells in a 9x13 inch baking dish and cover with aluminum foil. Bake until the vegetables are tender, about 30-35 minutes. Remove the foil, sprinkle the cheese over the top, and continue to bake until the cheese is bubbling and lightly browned on top, 20-30 minutes. Let rest for 5 minutes before serving.


Generously adapted from The Best International Recipe

Thursday, July 19, 2012

roasted cauliflower with kalamata vinaigrette


Anyone who has ever lived with me can testify to the fact that I have an addiction a reasonable love for roasted vegetables. Sweet potatoes. Broccoli. Onions. Red peppers. Butternut squash. Carrots. Zucchini. Asparagus. Et cetera, et cetera, et cetera. Nothing is safe in my kitchen. Whatever is in season inevitably gets tossed with some oil and herbs/spices and thrown into a hot oven until the smell of caramelized goodness dancing through the air is too much for me to resist. Oh, mercy.

So when I saw this recipe, I immediately knew that at least half of the dish would be amazing. If you've never had roasted cauliflower before, I urge you to rectify that right away. Roasting this otherwise bland, nondescript, and often looked-down-upon veggie transforms it into something magical, giving it a nutty flavor that can't be beat. Add a garlicky, salty Kalamata dressing, and this homely plant food becomes the perfect side dish or first course.

While I loved the fun presentation of the thick slices of cauliflower, I'll admit that it was a bit messy and crumbly to work with. Next time, I'll most likely simply cut it into bite-size chunks and toss it with the vinaigrette. And there will most definitely be a next time.

Oh, and as a bonus, any leftover vinaigrette would be fabulous on a Greek salad!

Roasted Cauliflower with Kalamata Vinaigrette
Yield: 4 servings

1 head cauliflower (2 1/2 to 3 pounds)
1/4 cup extra-virgin olive oil, divided
1 small garlic clove
1 to 2 tablespoons fresh lemon juice or red wine vinegar
1/4 cup pitted Kalamata olives, finely chopped

Preheat oven to 450°F.

Cut cauliflower lengthwise into 3/4-inch-thick slices and place in a large 4-sided sheet pan coated with 1 tbsp of oil. Brush a 2nd tbsp of oil onto the top-side of the cauliflower and season with salt and pepper. Roast, turning once or twice, until golden and just tender, about 25 minutes.

While the cauliflower roasts, mince and mash the garlic to a paste with a pinch of salt. In a small bowl, whisk together the garlic, lemon juice or vinegar, remaining 2 tablespoons oil, olives, and salt and pepper to taste. Serve the cauliflower drizzled with the Kalamata vinaigrette.

Adapted from epicurious

Tuesday, July 17, 2012

buckeye fudge brownies


There are some days that only a concentrated dose of chocolate will fix. Ask virtually any female. It's a proven fact.

Anticipating a difficult end to the work week, my coworkers were actually dreading the arrival of Friday afternoon last week. Determined to decrease the stress level for everyone, I decided that a sweet treat was most definitely in order. Enter: these brownies. Or, shall we simply call them fudge? So incredibly rich and dense, they could easily fall into either category. And that's just fine by me. Add a middle layer of sweet peanut butter filling, and these babies are the perfect de-stresser for just about any situation.

Full disclosure: I actually wasn't crazy about this recipe at first. A little too eager to try the finished product, my still-warm-from-the-oven sample had a texture that was just too soft for my liking. But, after (im)patiently waiting for them to cool to room temperature, they finally won me over. And if my coworkers' opinions mean anything (one of them admitted to eating four), I wasn't the only one to fall under their spell. Moral of the story: these are best eaten at room temperature or colder.

Buckeye Fudge Brownies

1 1/4 cup unsalted butter (2 1/2 sticks)
2 1/2 cups sugar
1 3/4 cups unsweetened cocoa powder
1/2 tsp salt
1 tsp pure vanilla extract
4 large eggs, cold
1 cup all-purpose flour

1 (14 oz) can sweetened condensed milk
1/2 cup smooth peanut butter

Preheat the oven to 325°F. Line a 9x13 inch baking dish with parchment paper or foil, leaving an overhang on two opposite sides.

In a large bowl whisk together the peanut butter and sweetened condensed milk. Set aside.

In a second large, heatproof bowl, set over a pan of barely simmering water, combine the butter, sugar, cocoa, and salt. Stir from time to time until the butter is melted and the mixture is smooth and hot enough that you want to remove your finger fairly quickly after dipping it in to test. Remove the bowl from the pan and set aside briefly until the mixture is only warm, not hot.

Stir in the vanilla with a wooden spoon. Add the eggs one at a time, stirring vigorously after each one. When the batter looks thick, shiny, and well blended, add the flour and stir until you cannot see it any longer, then beat vigorously for 40 strokes with the wooden spoon or a rubber spatula.

Spread half of the mixture evenly in the lined pan. Top with the peanut butter mixture, distributing it evenly over the brownie layer. Top with the remaining brownie batter and spread it into a smooth surface.

Bake until a toothpick plunged into the center emerges slightly moist with batter, 30-35 minutes. Let cool completely on a rack then place the pan in the freezer until the bars are firm. (This will allow for the smoothest, cleanest lines when cutting the brownies into squares.)

Lift up the ends of the parchment or foil liner, and transfer the brownies to a cutting board. Cut into squares.

Brownies adapted from Smitten Kitchen; Peanut butter filling from Cookies and Cups

Sunday, July 15, 2012

arugula, potato, and green bean salad


In my book, nothing beats a fresh, no-fuss salad for a quick lunch or dinner on a busy summer day. It's stress-free. It doesn't involve opening a hot oven on a hot day. It can be adapted to match anyone's tastes. Perfect!

I first made this salad about two years ago...and now I'm kicking myself for not making again until now. Part potato salad-part veggie ensemble, it boasts both a complex variety of flavors and distinct textures. Combining crisp, blanched green beans, creamy potato bites, crunchy toasted walnuts, peppery arugula, and a tangy vinaigrette, it is anything but a boring salad.

My only change to the original recipe was to use extra virgin olive oil in place of the walnut oil, since I had none on hand. Though I'm sure the dressing would be even lovelier with the walnut, I found it perfectly amazing regardless.

Arugula, Potato, and Green Bean Salad
Yield: 8 first course salads or 4 main dish salads

1 ounce walnuts (about 1/3 cup)
1 1/2 pounds fingerling or butter potatoes, cut crosswise into 1/2-inch-thick rounds/chuncks
6 ounces green beans, trimmed and cut into 2-inch segments
2 tablespoons white wine or other mild vinegar
2 tablespoons plain yogurt
1 teaspoon Dijon mustard
1 teaspoon coarse salt
Pepper to taste
2 tablespoons walnut oil (or extra virgin olive oil)
3 ounces baby arugula

Over medium-high heat, toast the walnuts in a dry pan until fragrant, being sure not to burn them. Remove from the heat and coarsely chop. Set aside.

Bring a medium saucepan of water to a boil. Add potatoes, and cook until tender, about 10 minutes. Using a slotted spoon, transfer potatoes to a colander to drain and cool. Set aside.

Prepare an ice-water bath in a large bowl and set aside. Return pan of water to a boil. Add green beans, and cook until tender and bright green, about 3 to 4 minutes. Using a slotted spoon, transfer the beans to the ice-water bath to stop the cooking. Drain.

Whisk together vinegar, yogurt, mustard and 1/2 teaspoon salt in a small bowl; season with pepper. Add oil in a slow, steady stream, whisking until emulsified.

Arrange arugula, potatoes, and green beans on a platter. Season with remaining 1/2 teaspoon salt and 1/4 teaspoon pepper. Drizzle with dressing and sprinkle with toasted walnuts. Toss to coat.

Adapted from Smitten Kitchen

Thursday, July 12, 2012

paprika chicken


When I first picked up this cookbook in a used bookstore and eagerly began flipping through the pages of enticing recipes - ambitiously dreaming up my mental checklist of all the ones I would make - this dish immediately caught my attention...for a number of reasons. First, I love Hungarian paprika. There's just something about that smokey-sweet pepper combo that adds such a dynamic flavor to even the most basic chicken dish. Second, it's a super healthy meal. It is no secret that I adore the excuse to make rich, elaborate desserts for any and every occasion, special or not. When cooking for myself, though, I'm pretty strict about sticking with a nutritious diet. (You know, to balance out all the cake and cookies from said occasions.) This dish perfectly suited that profile - low in fat but loaded with flavor.

Simple, quick, and guilt-free. Now that is what I call the perfect weeknight dinner.

Paprika Chicken

4 boneless, skinless chicken breasts
Kosher salt
extra virgin olive oil
2 medium onions, finely chopped
1/4 tsp salt
2 tbsp sweet Hungarian paprika
1 (14-ounce) can whole tomatoes in juice, partially drained
1/2 cup chicken broth
1 1/2 tsp all-purpose flour or corn starch, stirred together with 1 tbsp water
2 tsp sour cream or plain Greek yogurt
2 tablespoons fresh cilantro, chopped

In a large bowl, add 1/4 cup of salt to 2 quarts of cold water, stirring until the salt is dissolved. Add the chicken breasts to the brine solution and allow to soak for 30-60 minutes.

Rinse the chicken off and pat dry with paper towels. Using a sharp knife, cut each breast into one-inch pieces. Set aside.

Heat a drizzle of olive oil in a Dutch oven or large, heavy pot over medium-high heat. Add the onions and salt and cook, stirring occasionally, until the onions are tender but not browned, about 5 minutes. Add the paprika and stir for 1 minute. Add the tomatoes and broth, breaking up the tomatoes with a wooden spoon as you stir. Add the chicken pieces, cover, and simmer, stirring occasionally, for 10 minutes. Uncover and simmer, stirring every few minutes, until the chicken is just cooked through, 5-10 minutes. Combine the flour or cornstarch mixture in a separate bowl and add it into the sauce. Simmer until the sauce is slightly thickened,, about 2 minutes. Remove from heat, season with salt, and stir in the sour cream or yogurt.

Sprinkle with cilantro and serve over rice or egg noddles.

Adapted from The Gourmet Cookbook

Tuesday, July 10, 2012

baked oatmeal


Baked oatmeal may have origins outside of Pennsylvania. I don't know. But in my heart and mind, this perfect breakfast treat is and always will be synonymous with nowhere more than Lancaster County. Having lived there for eight years from middle school to college, I can assure you that Pennsylvania Dutch food is comfort food at its best. Chicken corn soup. Whoopie pies. Shoofly pie. Friendship bread. Chow-chow. Ham Loaf. Apple dumplings. Apple butter. Oh my heavens. I'm getting hungry just at the thought of it all.

If I had to choose a favorite Lancaster staple, though, it would be baked oatmeal. Let's think about this for a moment. All of the sensible goodness of oatmeal + the added creaminess, sweetness, and crunch of milk, sugar, fruit, and nuts. It's like dessert for breakfast! And for every amazing baker that Lancaster can boast of, there are just as many variations of recipes for this dish. This particular one is especially sentimental for me as it is based on the one used by the mother of one of my dearest friends in the world, Ashley. Mrs. V is a phenomenal cook and always spoils me by serving this at least once during my yearly visits. I've modified the original recipe through the years - swapping out oil for melted butter, cutting the granulated sugar by half and replacing it with brown sugar, and mixing up the add-ins - all of which I've written into the recipe below.

Sidenote: Special thanks to my fabulous friend Sally - photography aficionado - for the fun little foodie photo shoot with her fancy shmancy new camera. You're the best. xoxo

Baked Oatmeal

1/3 cup butter, melted
1/4 cup sugar
1/4 cup brown sugar
1 egg, beaten
1/2 tsp salt
1 1/2 tsp baking powder
3/4 cup milk
2 cup old-fashioned oats
1/2 tsp cinnamon
1/2 cup frozen blueberries
1/4 cup pecans, toasted and chopped

Preheat the oven to 350°F.

In a large mixing bowl, stir together the butter, sugars, and egg until blended. Add the remaining ingredients and mix well. Pour into a greased 9x5 loaf pan.

Bake for 20-30 minutes, until 'set' in the middle.


This recipe is also fabulous with other fruit and nut combinations. Strawberries and walnuts...peaches and pecans...raspberries and almonds. The sky is the limit!

Oh, and you'll be glad to know that this dish can easily be doubled and baked in a 9x13 dish for 35-40 minutes. It's so good that you may just want to plan on that from the beginning. Trust me.

Sunday, July 8, 2012

pan-roasted fish with avocado-pineapple salsa


One of my favorite things about fish dishes is how fast they can come together. Take this meal, for example. Cutting board to dinner plate = about 30 minutes. You can't beat that for a homemade meal.

Nor can you beat the taste of this dish. When one of my favorite food bloggers posted the recipe this past winter, I knew I had to try it. Now I'm wondering what took me so long to actually do it. Light and fresh and full of tropical flavor thanks to the salsa, this meal is perfect for these ridiculously warm summer nights when the last thing you want to do is stand over a hot stove for hours. As a bonus, any leftover salsa would be fabulous with a big bowl of chips...though I wouldn't count on having any leftovers...

Pan-Roasted Fish with Avocado-Pineapple Salsa

2  avocados, diced small
2 cups finely diced pineapple
1/2 jalapeno, seeds and ribs removed, finely chopped
1/2 small red onion, finely chopped
1/4 cup finely chopped fresh cilantro
juice of 2 limes*
salt and freshly ground black pepper
4 white fish fillets (5-6 oz each)
1 Tbs olive oil

Preheat the oven to 425°F. (Note: Depending on the thickness of your fish, you may not need to bake it at all. Mine cooked all the way through in the time it took to brown each side.)

In a medium bowl, gently toss together the pineapple, jalapeno, cilantro, red onion, and lime juice.  Season with salt and pepper to taste and set aside.

Pat the fish dry with paper towels and season liberally with salt and pepper.

Heat the oil in a large oven-safe pan until very hot, but not smoking.  Carefully place the fish in a single layer in the pan.  Allow to cook, without moving them, for 1-2 minutes, or until they are very light golden-brown. Very carefully flip the fish with a spatula.

Remove the pan from heat and transfer it to the oven.  Cook 5-7 minutes, or until the fish is opaque throughout and flakes easily with a fork.  The cooking time will vary based on the thickness of the fish, so start checking it around 4-5 minutes.

To serve, top each piece of fish with salsa.

*I used a heavy splash of red wine vinegar rather than lime juice. After all, limes are first cousins to lemons...

Wednesday, July 4, 2012

laura bush's texas governor's mansion cowboy cookies


If I had to choose one recipe to call my signature 'dish', it would be this one. Yes, I know that, as the title suggests, the distinction technically already belongs to the lovely former First Lady. But with as many times as I've made this recipe over the past 12 years (countless!), I'd like to think that it's a joint collaboration between the two of us.

Every four years, in the months leading up to the presidential election, a certain American women's magazine posts cookie recipes submitted by the wives of the Republican and Democratic presidential nominees. In return, they ask their readers to exercise their patriotism and freedom of baking by whipping up the opposing recipes and voting for their favorite. Of the five First Baker nominee elections, all but one of the winners have gone on to live in the White House. Clearly, this process is a (nearly) perfect reflection of the political ideologies taste buds of our country! This particular recipe handed Mrs. Bush a landslide victory over Mrs. Gore's gingersnaps in 2000. And I must say, it gets my vote every single time I make them. In the spirit of Americana and good food, happy 4th of July, y'all!

Laura Bush's Texas Governor's Mansion Cowboy Cookies
Yield: enough cookies to feed most of the Lone Star State

3 cups flour
1 tbsp baking powder
1 tbsp baking soda
1 tbsp cinnamon
1 tsp salt
1 1/2 cups butter, at room temperature
1 1/2 cups sugar
1 1/2 cups brown sugar
3 eggs
1 tbsp vanilla
3 cups semisweet chocolate chips
3 cups old-fashioned rolled oats
2 cups sweetened coconut flakes
2 cups chopped pecans (8 oz) (optional - I omit)

Preheat oven to 350ºF.

In a large bowl, whisk together the flour, baking powder, baking soda, cinnamon, and salt. Set aside.

In a second bowl, beat the butter on medium speed until smooth. Add the sugar and brown sugar and beat for another 2 minutes. Add the eggs one at a time, beating well after each addition. Mix in the vanilla. 

Stir in the flour mixture, blending until just combined. Add the chips, oats, coconut, and pecans and stir until fully incorporated.

Drop by rounded tablespoon onto an ungreased baking sheet, making sure to allow plenty of room between cookies. Bake for 10-12 minutes or until the edges are set and golden brown. Allow the cookies to cool on the pan for 1-2 minutes before placing on a cooling rack.

Adapted from Family Circle magazine 

Tuesday, July 3, 2012

chicken roulade with roasted red pepper pesto, spinach, and goat cheese


Whether it's for a special occasion or a simple weeknight dinner, I love a good chicken roulade. Stuffed with gourmet ingredients or whatever you have on hand, it can be as over-the-top...or as simple...as your imagination will allow. 

On this particular night, I was craving the creamy tanginess of goat cheese. Layered with homemade roasted red pepper pesto and fresh spinach, this dish had all the taste of a high-maintenance recipe but the ease and speed of a perfect weeknight dish. Bon appetit.


Chicken Roulade with Roasted Red Pepper Pesto, Spinach, and Goat Cheese

4 boneless, skinless chicken breasts
Table salt
2 ounces goat cheese
1 large bunch of spinach
roasted red pepper pesto
salt and pepper
extra virgin olive oil

cooking twine

Preheat oven to 350°F.

In a large bowl, add 1/4 cup of salt to 1 1/2 quarts of cold water, stirring until the salt is dissolved. Add the chicken breasts to the brine solution and allow to soak for 30-60 minutes.

Rinse the chicken off and pat dry with paper towels. Using a sharp knife, butterfly each breast and then pound them with a mallet until each piece is about 1/4 inch thick. Salt and pepper each side. Spread a generous dollop of pesto down the center of each piece and crumble a trail of goat cheese over top. Spread a thick layer of spinach leaves over the cheese. Starting at one end, roll the chicken up snugly, making sure to keep the pesto, cheese, and spinach encased in the meat. Using cooking twine, secure the roll.

Heat a drizzle of oil in a large oven-proof pan over medium-high heat. When the oil is hot but not smoking, add the chicken pieces, being sure not to crowd the pan. Brown the chicken on all sides, 1-2 minutes per side.

Place the pan in the oven and continue baking the chicken until an instant read thermometer registers 160°F, about 20-25 minutes depending on thickness.

Ashleigh Original :)

Monday, July 2, 2012

peanut butter-stuffed, buttercream-topped chocolate cupcakes


This past weekend simply begged for a special treat worthy of a grand celebration. Closing out my very first week at my new job...AND the arrival of my first big girl paycheck...meant that something sweet was definitely a necessity. Enter: Celebratory Cupcakes. Stuffed with a rich peanut butter filling and topped with a pillow of vanilla buttercream frosting, these moist chocolate treats were perfect for the occasion.

Note: These tasty gems are also a good morale boost when your power goes out during a horrible heat wave, and you can't open your refrigerator to access your less indulgent food. In the midst of 100°+ temperatures in Virginia this weekend, a horrific storm pummeled our state, leaving over one million people without electricity. Thankfully, my power was only out for what seemed like forever 36 hours, which is nothing more than a little inconvenience compared to the week-and-a-half-to-two-weeks that my parents have been told they'll be without power. Yikes! So glad my friends and I had these goodies to enjoy by candlelight in my dark little apartment while we discussed the many things we're thankful for.

Peanut Butter-Stuffed, Buttercream-Topped Chocolate Cupcakes
Yield: about 18 cupcakes

Cupcakes: 
1/2 cup plus 1 tablespoon Dutch-process cocoa powder
1/2 cup plus 1 tablespoon hot water
2 1/4 cups all-purpose flour
3/4 tsp. baking soda
3/4 tsp. baking powder
1/2 tsp. salt
2 sticks plus 1 tablespoon unsalted butter, at room temperature
1 2/3 cups sugar
3 large eggs, at room temperature
1 tbsp. vanilla extract
3/4 cup sour cream (I used vanilla Greek yogurt)

Preheat the oven to 350˚ F, and line cupcake pans with paper liners.  In a small bowl, combine the cocoa powder and hot water and whisk until smooth.  In another bowl combine the flour, baking soda, baking powder, and salt, and whisk to blend.

Melt the butter in a saucepan over medium-low heat. Place the sugar in a large mixing bowl and add the melted butter. Mix with an electric mixer until the mixture is cool, 1-2 minutes. Add the eggs one at a time, mixing well after each addition and scraping down the sides of the bowl as needed.  Blend in the vanilla and then the cocoa mixture until smooth.  With the mixer on low speed, add the flour mixture in three additions alternating with the sour cream (or yogurt), beginning and ending with the dry ingredients and mixing each addition just until incorporated.

Divide the batter evenly between the prepared liners.  Bake until a toothpick inserted in the center comes out clean, about 18-20 minutes, rotating the pans halfway through baking.  Let cool in the pan about 5-10 minutes, then transfer to a wire rack to cool completely.

Peanut Butter Filling:
3/4 cup butter
1/4 cup peanut butter
4 cups powdered sugar
2 tablespoons milk

Beat together butter, peanut butter, and milk in a large mixing bowl. Add powdered sugar one cup at a time, beating well after each.

When the cupcakes have cooled, cut a cone out of the top of the cupcakes and fill the holes with a small dollop of filling. Trim the bottom of each cone to fit over the filling and replace the little "caps."

Buttercream Frosting:
20 tablespoons (2 1/2 sticks) unsalted butter, softened
2 1/2 cups confectioners’ sugar (10 ounces)
1/8 tablespoons table salt
1 tablespoon vanilla extract
2 tablespoons heavy cream

In a large mixing bowl, beat butter at medium-high speed until smooth. Add the confectioners’ sugar and salt, and beat at medium-low speed until most of the sugar is moistened. Add the vanilla and heavy cream, and mix at medium speed until incorporated. Then increase speed to medium-high and beat until light and fluffy, about four minutes, scraping down bowl once or twice.

Using a pastry bag with a large tip, pipe a generous portion of frosting onto the top of each cupcake.

Cupcakes adapted from Martha Stewart's Cupcakes via Annie's Eats, Filling adapted from  Created by Diane. Frosting adapted from Cook's Illustrated via The Way the Cookie Crumbles.